Main My profile Registration Log out Login
Wednesday
24.4.2024
5:02 PM
Welcome Guest | RSS LoginRegistrationMain
Our poll
When we start the tournament, should it be decided by popularity or strength of that character?
1. Either one
2. Strength
3. Popularity
Total of answers: 3

Smash Trivia

  Game Modes

Brawl is chock full of little touches and details. I’d like to use today’s entry to communicate as many of those as I can bring to mind. I’ll be mentioning secret characters all over the place, so beware.

I’m sure I’ve mentioned some of these in prior entries, but oh well!


  Basic Play

  • ■If you flick up while shielding, your character will actually jump straight out of the shielding animation. This technique also lets you perform your up smash straight out of your shield—but both of these moves can only be performed when the Tap Jump option is set to ON.
  • ■If you perform the command for rolling back onto the stage immediately after grabbing the ledge, the period of invincibility you enjoy while climbing up will be slightly longer than normal.
  • ■The attack you can perform when climbing up from a ledge changes when your accumulated damage climbs over 100% or so.
  • ■When your character has left the screen and is being displayed in a tiny hoop, you incur a little bit of damage known as hoop damage. However, once your damage climbs over 150%, you will no longer take damage in this fashion.
  • ■When a new challenger appears after a multiplayer match, the person who won the last match will fight the new character.
  • ■Stickers and CDs picked up by a computer-controlled player will not be added to your collection.
  • ■There is a general trend of throw strength throughout Brawl’s character roster. On the whole, characters with supernatural powers tend to have the most powerful throws, while fighters like the ones from the Fire Emblem series tend to have weaker ones.


  Characters

  • ■Link and Toon Link can block projectiles and thrown items with their shields when they have it positioned in front of them. Toon Link tends to move about quite a bit, though, so it’s best not to place too much stock in his shield block.
  • ■Enter the taunts ↑↓↑ quickly to make Samus shed her armor. You really have to input the commands quickly so it helps to frantically rock your finger back and forth across the buttons to get it to work.
  • ■Kirby, King Dedede, and Wario can eat items using their Inhale and Chomp special moves. Eating bombs stuns the character for a brief moment and causes a small bit of damage to him.
  • ■After inputting the command for Fox and Falco’s side special attack, quickly press the special move button a second time to throw on the emergency brake and stop the attack.
  • ■When you head to the results screen after a match between Fox and Falco or Fox and Wolf, the winning character will utter a special winning phrase.
  • ■A good number of projectiles, like Fox’s Blaster, weaken when used from far away. Snake’s Remote-Controlled Missile is an exception to this rule. You’ll do more damage with the missile if you hit from far away.
  • ■When playing as Sheik/Zelda or the Pokémon Trainer, if you manage to score a Smash Ball and are in standby mode to use your Final Smash, this status will carry over when you transform or switch out Pokémon. Other status changes, such as growing big off of a Super Mushroom, do not carry over between Pokémon.
  • ■Zelda’s back midair and forward midair attacks (Lightning Kicks) as well as Captain Falcon’s forward midair attack (Knee Smash) deliver devastating blows when they score a clean hit. Aim to connect right at the start of the attack.
  • ■When charging Pit’s Palutena’s Arrow attack, make Pit aim straight upward by holding up. Once in this position you can, of course, fire straight upward.
  • ■Pit’s down special move, the Mirror Shield, not only has the ability to reflect attacks but will actually turn around any opponents who make contact with the shield while Pit is bringing it out.
  • ■Every once in a while Pit will utter "I’m done for..." as his death cry.
  • ■Wario’s down special move, the Wario Waft, grows stronger over time. The move retains its charge even if you die so you should have time to get off a fully charged fart right before the end of a 2-minute match. Don’t forget!
  • ■When cruising along on the Wario Bike (Wario’s side special move) you can perform taunts and wheelies.

    screenshot

    Here’s Wario taunting while he rides.
    Do a wheelie by holding up.

  • ■If you walk up to your fallen bike as Wario and input the command for your side special move, Wario will get back on his bike. You can also ride any downed motorcycles from other Warios.
  • ■When playing as the Pokémon trainer, if any of your Pokémon take on a tired appearance in their idle pose, it’s time to swap them out for a new Pokémon. Pokémon start to look tired when they have about 30% of their stamina left, and when they are completely exhausted their attack power diminishes.
  • ■Lucas’s PSI Magnet (his down special move) delivers an attack as the move finishes.
  • ■Ness’s PSI Magnet (his down special move) pushes away foes with a gust of wind as the move finishes.
  • ■King Dedede’s side special move, the Waddle Dee Throw, tosses out a Waddle Dee, Waddle Doo, or occasionally a Gordo. The ratio that determines the frequency with which each one appears is 35:10:4 respectively.
  • ■Performing the Waddle Dee Throw next to a Waddle Dee or Waddle Doo makes King Dedede pick up the downed minion and throw it again. You can also pick up the troops of other King Dededes this way.
  • ■All of Marth’s sword-based attacks are stronger when you connect using the tip of the sword.
  • ■If you charge Marth’s neutral special move to it’s max in midair, Marth will rush forward while attacking, making it a useful recovery move.
  • ■The kick in Luigi’s down taunt is an actual attack. It even has a meteor smash effect.
  • ■Luigi’s side special move, the Green Missile, will explode 1/8th of the time. When this happens, you’ll do the maximum damage possible, even without charging the attack.
  • ■Tap the direction opposite the way you are facing immediately after using Captain Falcon‘s or Ganondorf’s neutral special move to make your character switch the way he’s facing and increase the power of the attack.
  • ■The strength of Lucario’s Aura-based attacks is influenced not only by Lucario’s current damage percentage but also ever so slightly by its standing in the current match.
  • ■R.O.B.’s character symbol visually incorporates the design of R.O.B.’s gyros and the mark of the Subspace Emissary.

    Oh... It’s true.

  • ■Use Snake’s neutral special move, the Hand Grenade, and allow the device to explode near him. Snake will cover his ears.
  • ■If you hit the opponent with Snake’s side special move, the Remote-Controlled Missile, Snake will do a quick fist pump as if to say "Yes!" On the other hand, if you miss, Snake will do a quick pose to show his disappointment.
  • ■Snake’s down special move, C4, can also be placed on walls and opponents. As with Gooey Bombs, occasionally the explosive will transfer to a new carrier if you brush against it.
  • ■Approximately one out of every 6 C4 packs Snake uses will be a C3 butterfly explosive. The power of the attack is unchanged in these instances.
  • ■Snake is unique in that only he will utter one of several lines when he eats food.(For example, there’s a 1/100 chance that Snake will say "This is too good!")
  • ■Using Snake’s C4 packs while falling can occasionally prove useful as a recovery technique. Drop a pack straight beneath yourself, perform an accelerated fall to catch up with the pack, and then detonate the explosive. Snake will be propelled upward with the force of the explosion.
  • ■You can end Snake’s cardboard box taunt early by pressing a button.
  • ■Press a button during Sonic’s neutral special move, the Homing Attack, to reduce the amount of time Sonic spends rising into the air.
  • ■When Jigglypuff’s shield breaks, it is sent rocketing off the screen.
  • ■Brawl’s director, Masahiro Sakurai, provided the voice for King Dedede.


  Stages

  • ■When you attack King Bulblin on the Bridge of Eldin stage, he momentarily reels back in pain and will be unable to harm players.
  • ■You can also beat up the Bulblin who follows after King Bulblin.
  • ■If you successfully complete any of the minigames on the WarioWare, Inc. stage, you’re rewarded with one of the following effects bestowed at random.

    ・Invincibility
    ・Giant size
    ・Small reduction of your current damage percentage
    ・An item dropped right in front of you

  • ■The clock on top of the Town Hall on the Smashville stage pulls the time from your Wii’s internal clock.
  • ■If Snake is KO’d while doing his special taunt on Shadow Moses Island, the party he was communicating with will call out his name in a panic.
  • ■If Snake fights against Falco and performs his special taunt, a conversation with a special guest occurs.

    screenshot

    A friendly cameo!

  • ■You can ensure you go to World 1-1 on the Mushroomy Kingdom stage by holding down a button as you select the stage. For the GameCube and Classic Controllers, hold down the X or Y Buttons. For the Wii Remote control scheme, use the A Button, and for the Nunchuk and Wii Remote combo, hold down the C Button.
  • ■If you feel like you’d like to play Mushroomy Kingdom’s World 1-2, you can choose that one as well. When playing with the GameCube or Classic Controller, hold down the L Button or R Button while selecting the stage to go to World 1-2. When using a Wii Remote, hold the B Button, and when using the Nunchuk and Wii Remote combo, hold down the Z Button.
  • ■On the base background for Flat Zone 2, you’ll see the diver from Octopus appear. He will attempt to pick up all the items lying around on the stage.
  • ■If you zoom the camera way out on Flat Zone 2, you’ll see that you’re brawling inside a giant Game & Watch. The Flat Zone Game & Watch in Melee was red, but the one in Brawl’s Flat Zone 2 stage is blue.
  • ■In the Flat Zone 2 and Hanenbow stages, all characters are two dimensional.


  Menu and Game Modes

  • ■Wiggling the C Stick on the GameCube Controller or the right Control Stick on the Classic Controller changes the angle you view the menu screens from. You can also change the viewing angle in the Coin Launcher mode the same way.

    screenshot

    Round and round the camera goes.

  • ■Return to the previous menu by holding down the B button on the character-selection screen.
  • ■On the character-selection screen, you can start a brawl as Zero Suit Samus by selecting Samus and holding down one of the shield buttons until you move to the stage-selection screen.
  • ■If you click on the portraits at the bottom of the screen for your selected character, you can choose which character you start the brawl as. Use this tactic to start the match as your favorite of the Pokémon Trainer’s Pokémon or to start a match as Sheik.
  • ■The disc starts preparing to load your brawl from the character-selection screen. So when choosing a color for your character, try to pick the color you like and stay with it instead of running through color selections by hammering the buttons. Doing so will reduce the amount of time it takes the stage to load.
  • ■On the results screen for brawl matches, the winning player can select the pose their character takes on screen by using the four directions on the +Control Pad. Start pressing the button for your preferred pose once the match has ended but before the game moves to the results screen.
  • ■You can change the way your trophies are arranged in the Trophy Hoard by holding a direction on the +Control Pad or Control Stick as the Trophy Hoard comes on screen. Choose from many formations like a pyramid or spiral.

    Up: Pyramid
    Down: Inverted Pyramid
    Left: Straight Rows
    Right: Staggered Rows
    Shield Button: Spiral

  • ■If your teammate exhausts his or her supply of lives during a stock team brawl and you still have a life to spare, your teammate can take one of your lives and jump back in the game by pressing the A Button and B Button at the same time. These buttons correspond to the standard-attack and special-move buttons on most control schemes, but even on the Wii Remote you need to press the A and B Buttons.
  • ■On the Tourney mode character-selection screen, you can toggle between character-related options using the GameCube Controller’s C Stick, the Wii Remote’s - Button, etc. Use this feature to start a match as Zero Suit Samus, start your fight as Sheik, or to choose which Pokémon you’ll use first as the Pokémon Trainer.
  • ■When shuffling through Replay/Album/Stage data on their respective screens, you can use the GameCube Controller’s C Stick or the right Control Stick of the Classic Controller to scroll through your data by increments of five, backward or forward.
  • ■Scroll through your list of stickers in the Sticker Album and Sticker Center with the GameCube Controller’s C Stick or by pressing up or down on the Classic Controller’s right Control Stick.
  • ■Complete All-Star or Classic mode and you’ll get to see a character roll. You can increase the speed at which the roll scrolls by pressing the + / START Button. Press it again to return to normal scroll speed.
  • ■When inputting text anywhere in the game, you can delete everything you’ve written in the field by holding down the cancel button on your controller. This trick is particularly handy when you want to quickly delete the default name for a custom stage.
  • ■Target Smash adds new levels after you come across them in other modes. Therefore in order to increase the number of Target Smash stages you can play, you need to increase the difficulty you play Classic mode on. However, you don’t need to beat the difficulty level you’ve selected to unlock the corresponding Target Smash stage.
  • ■In Target Smash and Home-Run Contest there is a Total High Score function that keeps track of the combined top score for all your characters in each mode. This score is probably the best indicator of how skilled you are at these modes.
  • ■Pause during play in Target Smash and you can see a map of the entire stage.

    screenshot

    You’ll get to see the whole stage and you can
    confirm your position.

  • ■In Home-Run Contest mode, connect with the tip of the bat when you swing to maximize the distance Sandbag flies.
  • ■You can increase the speed your fired coins travel at in Coin Launcher by holding down the button a bit before firing.
  • ■The Coin Launcher is set up so that there is a low probability of trophies appearing that you haven’t yet collected. By defeating little groups of enemies you raise the likelihood of new uncollected trophies appearing. Therefore, trying to be sneaky and bailing out without trying to shoot down missiles or enemies will only end up hurting your chances of completing your collection.
  • ■When playing a game demo from the Masterpieces area, press the HOME Button to view an Operations Guide for that game. The time you spend reading won’t count toward your demo time limit, so take your time.
  • ■When viewing a replay or watching in Spectator mode, you can change the person the camera follows with the shield button. You can also change the angle you’re viewing the action from by pressing any of the directional commands.


  Items

  • ■Throw an item with a smash command to make it fly farther and hit harder.
  • ■Throw battering items by pressing the direction you wish to throw the item plus the shield and standard attack buttons. This is easier to do when using a GameCube Controller (Z Button) or Classic Controller (ZR Button).
  • ■Perform a smash attack while holding a shooting item that’s out of ammo and you will discard it. Just remember that this doesn’t work for Lip’s Stick or the Star Rod because both of those are battering items.
  • ■The Timer will effect players in one of three ways when you pick it up. It may slow down all your opponents, slow down everybody, or just slow you down.
  • ■Sometime the head pops off of the Hammer. Once its loose, it becomes a frightfully powerful throwing item.
  • ■When you pick up a Golden Hammer, there is a small possibility that the hammer will become a Golden Squeaky Hammer. These are incapable of hitting enemies or inflicting damage.
  • ■Pitfalls have a powerful Meteor Smash effect when they hit an enemy in the air.

    screenshot

    It can be pretty tough to peg an airborne target with
    one of those though.

  • ■The Dragoon Parts will not appear in some matches. Whether they appear or not is decided by a simple set probability.
  • ■Once all three Dragoon Parts appear on screen, no Smash Balls will appear until you’ve removed them from play.
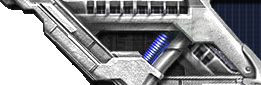
  • ■You can turn around while holding the Cracker Launcher by quickly tapping the direction opposite the way you are currently facing.
  • ■The last round in the Cracker Launcher has a long gray smoke tail on it that lets you know you’re out of ammo. This final shot is more powerful than the standard rounds.
  • ■If you peg an enemy with a Team Healer, it may heal or hurt them.
  • ■Just before it explodes, the Pokémon Electrode will flash. During this period you can pick it up and throw it like an item.
  • ■Occasionally both Electrode and the Smart Bomb item will fail to explode. Be careful though—they may explode some time after.
  • ■When summoned, the Assist Trophy Dr. Wright has a 1 in 10 chance of calling forth a massive skyscraper. The damage it does is appropriately massive.
  • ■If you attack the Assist Trophy Mr. Resetti, he will occasionally grow angry and cause an explosion. If you hear him yell "Quiet down, will ya? I’m talkin’ here! HEY!" or something to that effect, it’s your cue to flee.
  • ■If Mr. Resetti appears on a fall-away platform or a platform that moves off the screen, he’ll get angry with you as he disappears.

    screenshot

    Sorry about that, Mr. Resetti.


  The Subspace Emissary

  • ■During The Subspace Emissary, Player 2 can perform a Space Jump by pressing the START Button on the GameCube Controller or the + Button on any of the other controller schemes. During play you may see Player 2’s character teleport back onto the screen when they are about to move out of the area displayed on the screen. A Space Jump is essentially the same action.

    screenshot

    It’s really handy, so use it often!

  • ■The Subspace enemies known as the Primid change their expressions each time you turn on the game. There is quite a variety of faces for you to discover.
  • ■The Subspace enemy Shellpod can be turned into two different trophies. Catch it with its shell on or with its shell off.
  • ■Petey Piranha takes more damage from attacks directed at the cages than it does from attacks aimed at its body. The most effective attacks to use on it are the ones that hit both its body and one of the cages.
  • ■Higher difficulty levels yield more stickers and Trophy Stands. If you’re looking to get your hands on a boss trophy, try raising the difficulty.
  • ■Each sticker has a set level of rarity. Things are arranged so that new stickers unlock as you progress through the game. Expect to see new stickers as you play through the game, then again once you enter the Great Maze and then yet again once you’ve completed the game once.
  • ■When choosing a character with the ability to transform or change (Zelda, Samus, Pokémon Trainer) you can designate the form you’d like to the character to start the stage in. On the GameCube Controller, this is accomplished by moving the C Stick left and right. When using the Wii Remote, press the – Button to switch. When using the Wii Remote and Nunchuk combo, switch with the C Button. Finally, on the Classic Controller, you can switch using the right Control Stick.
  • ■On the sticker-placement screen if you hover a sticker over an area where another sticker has already been pasted down and wait a moment, the sticker you are holding will slowly slide over to the nearest available location. Use this technique to pack each trophy base with the maximum number of stickers possible.
  • ■Once you’ve filled a trophy base with as many stickers as you can, try using the Random function to help you sneak a few more stickers onto the base.
  • ■With the Narrow It Down feature, you can designate the type of sticker you’d like the Random function to look for.
  • ■Once you’ve entered Subpsace, you can press the START Button or the + Button to bring up a map of the whole area. Once you’ve taken a quick lap around the place, you’ll be able to confirm the location of enemies you still need to beat on the map.
  • ■For the final portion of The Subspace Emissary, you’ll only be able to use the characters you’ve revived. If you don’t bother to save any characters along the way, you’ll have only five characters (King Dedede, Ness, Luigi, Kirby, and Sonic) at your disposal for the final showdown.
  • ■Try venturing down routes different from the ones you traveled last time to complete your collection of game cinematics. For example, if you previously chose to save Zelda, save Peach this time instead. There are at least 3 areas in the game where you are given a choice to go one of multiple routes along a series of branching paths.
  • ■You can use every sticker in your collection, even if you are just starting The Subspace Emissary for the first time. When starting over or making a second run through, remember that stickers you’ve picked up anywhere in the game are yours to use freely. Make good use of those stickers.


I’ve got several more tidbits I could add on here, but this list is already too long as it is, so I guess I’ll end things here.

It sure is hard to figure out exactly what constitutes trivia, isn’t it?

Login form
Login:
Password:
Search
Site friends
Kevin's Mugen


M.U.G.E.N. Invasion
Statistics

Total online: 1
Guests: 1
Users: 0

Copyright MyCorp © 2024